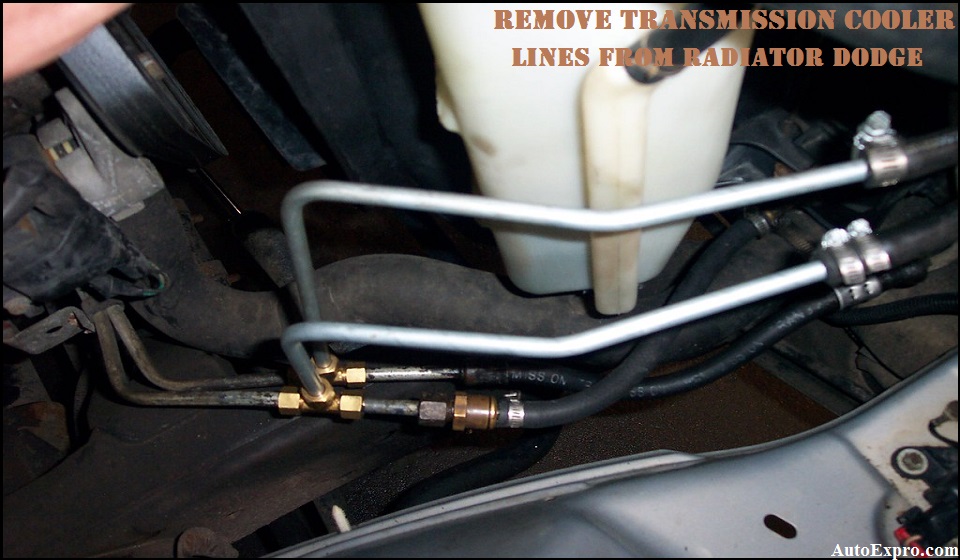
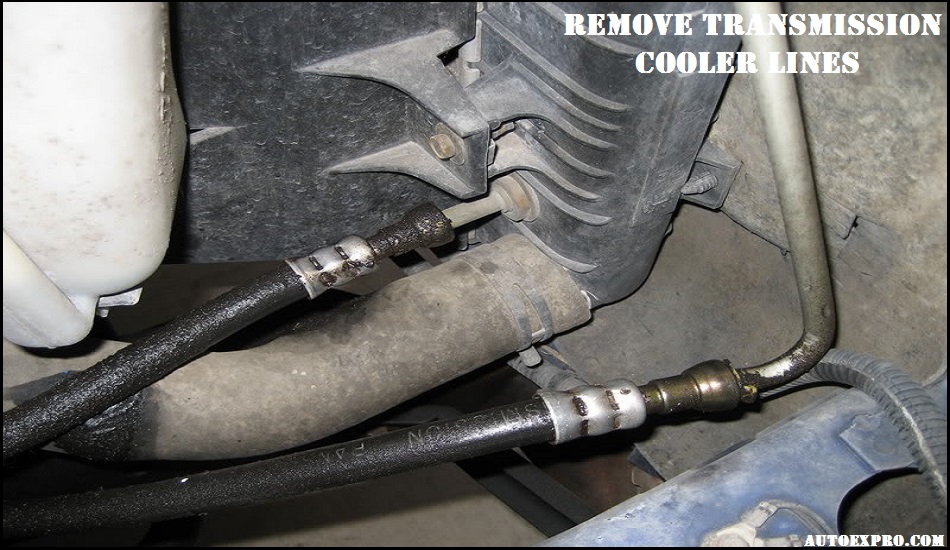
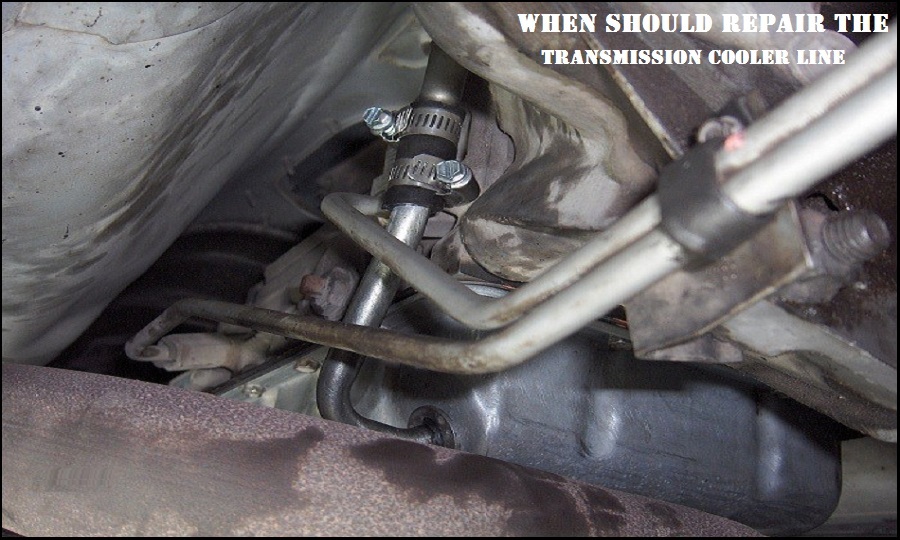
 The transmission cooler line is a tiny line and that’s why it seems easy to disconnect. But the truth is- it is not easy at all to disconnect a transmission cooler line from the connections.
This happens because these lines are attached following a special system. However, it is not also very tough to remove. You can remove it easily if you know the trick. Pulling harder won’t work at all. You’ll have to focus on the clip that holds the line.
In this article, I’ve tried to show you how to remove transmission cooler lines from radiator dodge. For better understanding, I’ve also shown how those lines are connected and secured. I hope this will help you with the task.
But at first, let’s know a bit about the transmission cooler line and what it does.

What do Transmission Cooler Lines Do?
A running engine creates an extremely high temperature in the system. As a result, everything becomes overheated. Thus transmission fluids get overheated too. The main task of transmission fluids is keeping the transmission cool. But when the fluid itself is hot, there is no chance that it can keep the transmission cool.
A transmission cooler line carries the transmission fluid from the transmission to the radiator. There the fluid cools down. Then, another line carries the cold transmission fluid to the transmission where it keeps the transmission cool.
This is what transmission cooler lines do.
Why should You Remove Transmission Cooler Lines?
Transmission cooler lines are typically not prone to wear or tear easily. But we know that problems can occur at any time. So, the transmission cooler lines can tear or wear out sometimes. Also, there might be a leak in it.
A torn or worn transmission cooler line results in losing transmission fluids. Even a tiny leak can gradually reduce the amount of transmission fluid you have. No matter what happens, the final result is a deficiency of transmission fluid.
If something like this happens, the transmission cooler line should be repaired or replaced. For this, you should remove the old line and put a new one.
How are Transmission Cooler Lines Attached to the Radiator?
Removing the transmission cooler line from the radiator dodge is a tricky system. This is not attached following a regular system. That’s why removing it is a bit tricky.
While DIYers try to fix the cooler line issue by themselves, they get stuck because of not knowing the tricks to remove transmission cooler lines. Right now, I’m going to talk about the easiest ways to remove the cooler lines from the radiator dodge. But before that, let’s know how the cooler lines are attached to the radiator dodge.
A clip of strong wire is used to keep the transmission cooler line attached to the radiator dodge. The wire clip comes with 2-3 raised curves both inside and outside. The outside curves are visible from the outside and the inside curves are into the wide connecting screw. These inside curves hold the cooler line strongly.
So, if you want to get the cooler line removed, you can do two things- either you can somehow remove the wire clip or press the inside curves so that these leave the line.
Let’s learn how to do that.
How to Remove Transmission Cooler Lines from Radiator Dodge?
 Removing the transmission cooler line is a step-by-step process. But before starting the process, you’ll have to be prepared with the necessary tools. Typically, you’ll need a system for lifting your vehicle. Also, you can arrange a pair of gloves because you’re hands are going to be dirty without gloves.
Everything arranged? Okay, let’s start the process.
-
Find out the position of transmission cooler lines
Transmission cooler lines are some thin tubes ended up with a small and flexible nut. If you can’t find the lines, take help from the vehicle’s manual or Google.
If your vehicle is a front-wheel-drive one, you’ll find the lines somewhere besides the engine block. In the case of rear-wheel drive, the lines are under the passenger side area.
-
Lift the vehicle
After you mark the position of the cooler lines, it is time to lift your vehicle. You can follow any available way to do it. Just make sure that you have access to the lines.
You can take the help of floor jack and jack stands to lift your vehicle and keep it lifted. If you have a better option, you can use that. It doesn’t matter much as long as it is safe and you have access to the transmission cooler line.
-
Drain the transmission fluid
Now it is time to drain the transmission fluid inside. Otherwise, when you remove the line, it’ll create a mess. For that, locate the transmission fluid pan. This is a wide pan. It is easy to locate from under your vehicle.
You’ll find a drain plug there. Put a pan or pot under the plug and remove the plug. It’ll take some time to drain the fluid. To make the process faster and effective, you can drive the vehicle for a few minutes before you lift it. Doing this will make the fluid hot and thin. As a result, the fluid will come out easily.
If you want, you can open the transmission fluid pan and clean the sludge and dirt accumulated on it. This will enhance the overall performance of the transmission. However, it is not mandatory. If you have some time, you can do it.
Save the fluid because you’ll have to put it in again after repairing the line.

-
Remove the transmission fluid line
After you drain all the fluid from the pan, now you can proceed with removing the transmission fluid lines. Typically there is a plastic cap in the connecting area. Remove it. Don’t worry if yours doesn’t come with this cap. This is not mandatory.
After removing the cap, you’ll see the connecting point clearly. You’ll see the wire clip that you’ll have to remove. For that, you can use two easy methods. Here, I’m going to talk about both.
Method 1- In this method, you’ll focus on the inside curves. The idea is to press the inside curves so that those leave the line. You’ll find line detaching tools in the market. These tools are round-shaped and come with a thin lifted portion. Some of these come with handles and some don’t.
Get a line detaching tool and fasten it around the line just after the connecting screw. Make sure that the lifted part stays towards the connecting screw. It should fit the line. A slight gap won’t be a problem though. Slowly push it so that the thin lifted part goes inside the screw.
When the tool gets stuck, it means that it has reached the limit. Now you’ll have to push it harder. Push it hard and create constant pressure. It’ll make the inside curves bend and leave the line.
Method 2- In this method, you’ll remove the clip from the outside. For this, you’ll need a tool with a strong, sharp, and thin end. You can take help of a screwdriver or something like this.
The outer curves of the wire clip make a bit gap with the connecting screw. Pick the tool and place the pointy side on such a gap. Press it with précised strength. Doing this makes the gap wider and the tool enters the gap.
After that, pull the wire to the outer direction using the tool. Gradually increase the pulling pressure with control so that the tool doesn’t come out. Doing this will loosen the wire clip slowly. Then you can remove the clip and the line will also be removed easily.
Using any of these two methods, you can remove the other end of the cooler line for repairing or replacing it.
I suggest following the first one because it brings out the line and leaves the clip in its place. But method two brings out the clip too. So, while connecting the line again, you’ll have to put the clip properly in shape. That’ll take time and patience.
So, this is how you can easily take out the transmission cooler line from the radiator of your vehicle.
Video Review on Remove Transmission Cooler Line
Things to Focus on while Removing Transmission Cooler Line
Both the methods discussed in this article are very easy to apply. However, still, there are some things you should remember while doing this.
- No matter which method you’re following, make sure that you’ve drained the transmission fluid completely.
- Draining fluid from the fluid pan doesn’t guarantee that there is no fluid in the tube. So, while removing the line, be careful so that it doesn’t spread fluid suddenly after being free from the connecting screw.
- While pushing or pulling, have control over it. Try to increase the pressure gradually, not all of a sudden.
- The tools used in method two should be very thin. So, you’ll have to be careful about the safety of yourself as well as the components under the hood. Otherwise, damage may happen.
- If you follow the second method, don’t let the wire clip to be lost. While repairing the line, keep the clip in a safe place.
When should You Remove or Repair the Transmission Cooler Line?
 You should know exactly when you have to remove the transmission cooler line for replacing or repairing it. There are a few signs that ask you to do it. Here I’m going to discuss those.
If you see that the transmission is not working properly and the performance has gone down for it, the reason can be a leak in the cooler line that is lowering the fluid level. Low fluid level is the reason behind transmission overheating, which leads to performance-related issues.
Typically when the transmission is overheated, you’ll see a check engine light. Other signs of transmission overheating are slow response time, acrid burning odor, transmission slipping, etc.
Also, you can get to know when to replace or repair it by regular checking. Inspecting the components regularly is always a good idea. While performing the routine check, check the cooler line too for any visible issue. You might find a leak.
While checking for a leak, look at the rubber porting carefully. There could be signs of a potential leak. If you find any such sign, take care of it. Replace or repair it as soon as possible to prevent potential loss.
Also, check around the fittings of the line. There are multiple reasons for which the connecting points get damaged. So, besides checking the lines, focus on the fittings too. Besides, if you find signs of leaked oil around the lines, it also means that there is a problem with the line. So, take the necessary steps immediately.

Cost of Repairing Transmission Cooler Lines
Also, you can avoid all these by just visiting a mechanic. You’ll find mechanic shops around you where you can get this done without getting your hands dirty. Typically going to a mechanic with this issue will cost you around $100-$400.
The cost includes both the labor and necessary purchase. Around 60% of the money covers the labor depending on the place you’re going. The rest will be used to purchase necessary kits like a new fluid line and so on.
However, this is not the exact amount you may need. This is just a fair assumption.
Final Verdict
I hope now you know how to remove transmission cooler lines from radiator dodge. While doing it, stay careful and follow safety requirements.
Working on your vehicle is difficult. And when it is about working on the parts right under the hood, it becomes more difficult. So, if you don’t have experience with vehicle DIYing, you shouldn’t go for it.
If you’re not confident enough, you should leave the job to a mechanic. If you can do this under the supervision of a professional, it is better.
Leave a Reply